Hey Devs,
We’re really happy to announce Postman collections and orchestrations for QuickBooks Payments API.
A Postman collection lets you group individual requests together and interact with them without writing a single line of code. For more information about Postman collections, click here.
Using Postman Runner, a tool that chains together several API endpoints to create useful flows, you can easily see how effective a combination of several QuickBooks Online API calls can be. We’ve put together three such chains highlighting some of the most important use cases of QuickBooks Payments APIs. This tutorial will help you quickly get started using Postman Runner with the QuickBooks Payments APIs.
The Payments API allows you to process credit card payments on your eCommerce website or set up online processing for your customer’s site. In the same app, easily record transactions in QuickBooks Online. The QuickBooks Online Payments API is a RESTful API that is used to access QuickBooks companies. For more information about the Payments API’s, please refer to the API reference.
With all that lets get started! The first thing to do is to import a collection to your Postman App.
Importing the Payments API Collections to the Postman App
2. A new collection, “QuickBooks Payments API Collections” will show up in your Postman App.
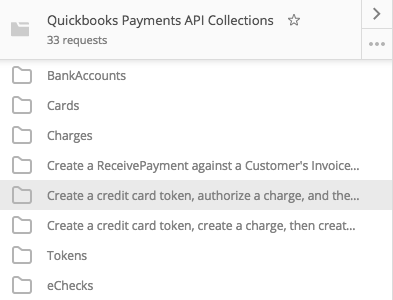
This collection contains five folders that group API calls related to specific objects. Three of them are common Payments API use cases for which we have created orchestrations.
Now that we’ve imported the collection to your Postman, lets take a look at one of the API calls.
1. Select the API call “Tokens-Create” from the Tokens folder. The API Call window opens up for “Tokens-Create”. This is a POST call with the following URI; the base URL for the Payments API is stored as an environment variable.

2. At this point, you need to enter your App credentials. Go to the gear icon in the top right of Postman and select Manage Environments.
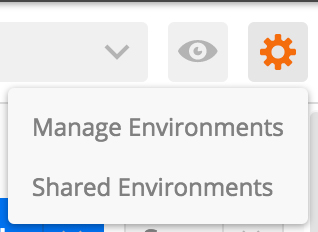
3. Select “QBOV3-Payments-Env-Variables” and fill in the consumerKey, consumerSecret, OAuth AccessToken, OAuth AccessSecret, and the RealmId with your credentials. For information on where to get these, please check out Configure the Postman Authorization header. Also note: the baseurl, companid, minorversion are all saved as environment variables here.
4. Select Body to take a look at the request body. You’ll see the request body of this call. In this use case, we will only be passing in the credit card details. For more information about the Token-Create API Call, please refer to its Reference.
{
  "card": {
    "expYear": "2020",
    "expMonth": "02",
    "address": {
      "region": "CA",
      "postalCode": "94086",
      "streetAddress": "1130 Kifer Rd",
      "country": "US",
      "city": "Sunnyvale"
    },
    "name": "emulate=0",
    "cvc": "123",
    "number": "4111111111111111"
  }
}
5. Hit the “Send” button, and you should see a response payload from the Token-Create API similar to this:
{
  "value": "a2e3366a-7a15-4d0a-b52c-b2af5c89a6fe"
}
Now that we’ve imported the collection to your Postman, let’s take a look at one of the use cases in detail.
In this tutorial, we will walk through “Create a credit card token, authorize a charge, and then capture the charge”.
1. Select “Create a credit card token, authorize a charge, and then capture the charge” under the QuickBooks Payments API Collection. There are three API calls within this use case, “Tokens-Create”, “Charge-Create”, and “Charges-CaptureCharge”. Lets take a look at each API Call and see what it does. In the “Tokens-Create” call, we enter in a credit card’s details, which creates a temporary token, which represents this Credit Card. Using this token, we create a charge in the next API Cal, “Charge-Create”. Within the body of the “Charge-Create” call, you see:
"capture": "false"This tells us that the card issuer has authorized a charge to be made against the specified credit card in the future. For example, a charge has been created at a restaurant, but the patron has not yet specified the amount of the tip. In this case, specifying “capture” as false means that the card issuer has authorized a charge to be made in the future, after the tip has been specified, and this part is represented by the “Charges-CaptureCharge” API Call.
The order in which the calls are made is important; making the “Charge-Create” call before “Tokens-Create” will result in an error.
Now that we understand what this orchestration does, let’s run it.
2. Open up the Postman Runner by clicking the “Runner” button in the top left corner of the Postman window.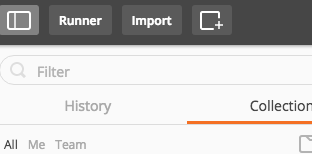
3. When the Runner Window appears, select “QuickBooks Payments API Collections”, and then select “Create a credit card token, authorize a charge, and then capture the charge”. For the other options select “QBOV3-Payments-Env-Variables” Environment, one iteration, and check Persist Variables.
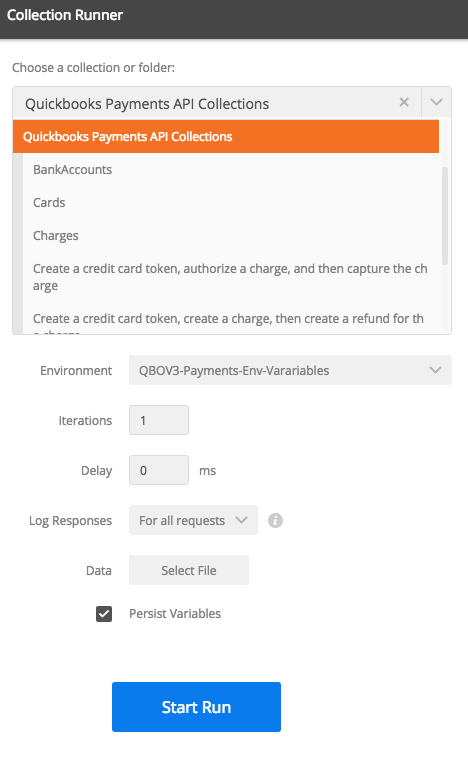
4. Select “Start Run”. Once the calls have been completed, the Run Results appears.

5. The collection runner allows the user to see the request URL, request headers, request body, response headers, and response body for each API call made. Select the API call and choose your preferred option in the menu.
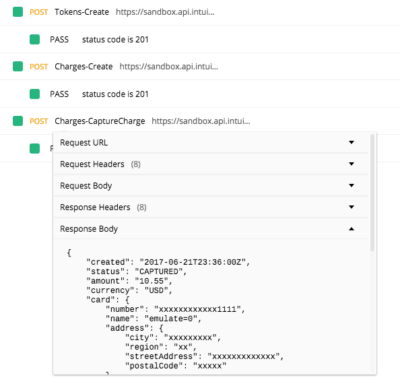
In the response body for the Charges-CaptureCharge API call, you should see something similar to this. Your response body will be unique to the request that you made.
Response Body:
{
    "created": "2017-06-21T23:36:00Z",
    "status": "CAPTURED",
    "amount": "10.55",
    "currency": "USD",
    "card": {
        "number": "xxxxxxxxxxxx1111",
        "name": "emulate=0",
        "address": {
            "city": "xxxxxxxxx",
            "region": "xx",
            "streetAddress": "xxxxxxxxxxxxx",
            "postalCode": "xxxxx"
        },
        "cardType": "Visa",
        "expMonth": "02",
        "expYear": "2020"
    },
    "capture": false,
    "avsStreet": "Pass",
    "avsZip": "Pass",
    "cardSecurityCodeMatch": "NotAvailable",
    "id": "E1OSTA7FL5ZX",
    "context": {
        "mobile": false,
        "recurring": false
    },
    "authCode": "833315",
    "captureDetail": {
        "created": "2017-06-21T23:36:00Z",
        "amount": "10.55",
        "context": {
            "tax": "0.00",
            "mobile": false,
            "recurring": false
        }
    }
}
Thats it! You just programmatically recreated a use case for the QuickBooks Payments API. Easy, right?


Leave a Reply