Are you an an accountant, pro adviser or a small business owner? Have you ever tried to integrate one or more of the Saas applications you use to run your business with QuickBooks Online? Unless you can code and use REST APIs, the answer is probably no. Introducing Zapier, making it possible to integrate with QuickBooks without writing code. If you are looking for very deep data integration between QuickBooks and another SaaS application then Zapier is not the tool for the job. However, Zapier will allow you to create integration’s for simple workflows. Here is how you do it.
Let’s start with using Zapier to integrate Harvest with QuickBooks Online.
Step 1: Get a free trial of QuickBooks Online
Step 2: Get a free trial of Harvest
Step 3: Get a free trial of Zapier to build the integration.
Now that that is completed, lets head over to Zapier and define our integration:
Step 1: Login to Zapier
Step 2: Create a new Zap.
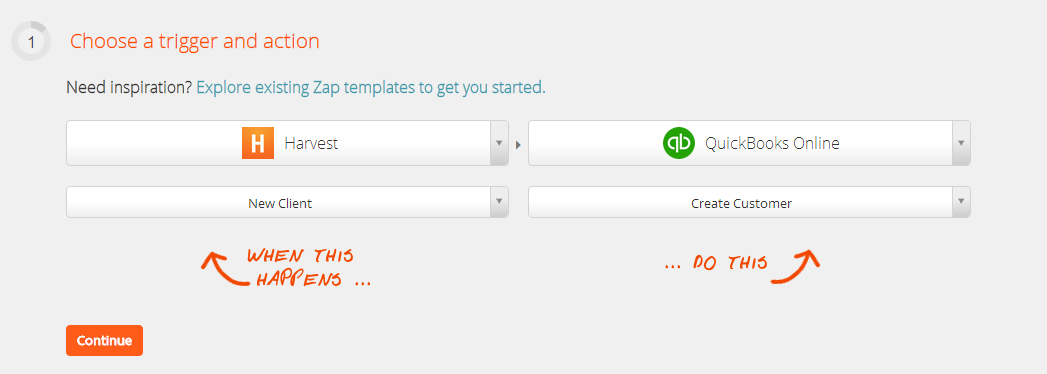
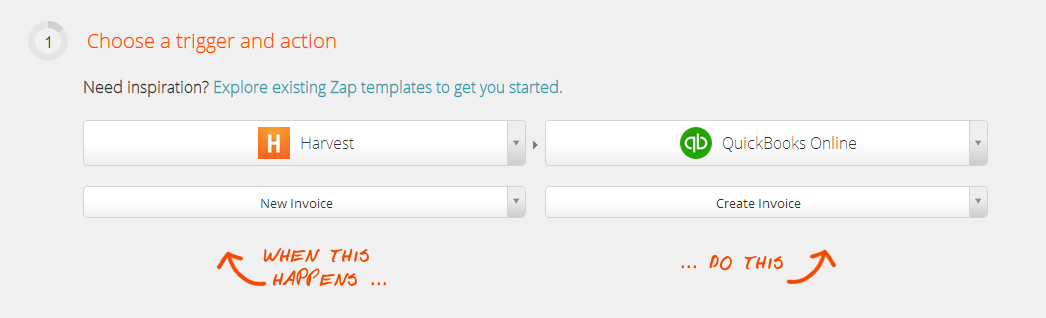
Step 3: Select Harvest as the trigger service and QuickBooks Online as the action service.
Step 4: Under Harvest select “New Client” as the trigger, and under QuickBooks Online select “Create Customer” as the Action
It should look like this:
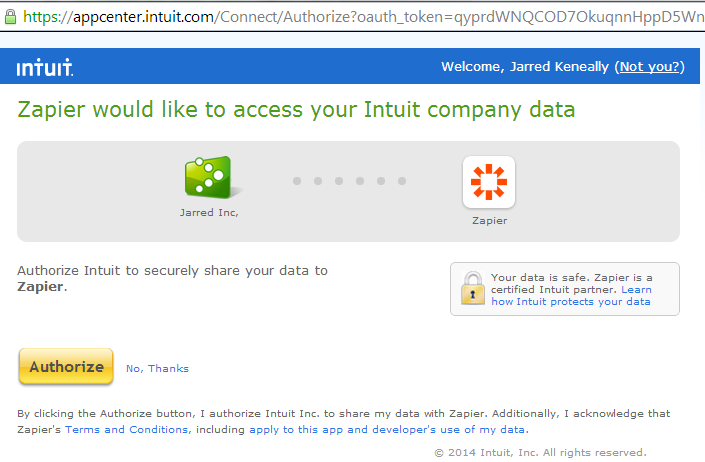
Ok, everything looks good so far. Now we have to authorize Zapier to access our Harvest account and our QuickBooks account.
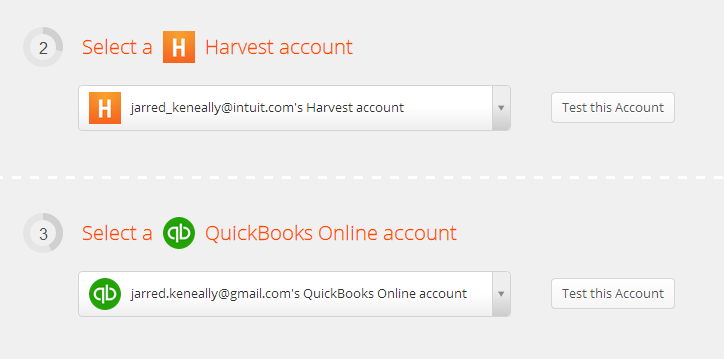
Step 1: Select a Harvest account from the drop down, log in to Harvest and authorize.

Step 2: Select a QuickBooks Online account from the drop down, login to QuickBooks Online and authorize.
OK, Zapier knows how to connect to Harvest and QuickBooks on our behalf now. If you want, you can click the “Test this Account” button to verify the connection.
For this exercise I skipped the section on filtering Harvest (#4 in the Zapier form)
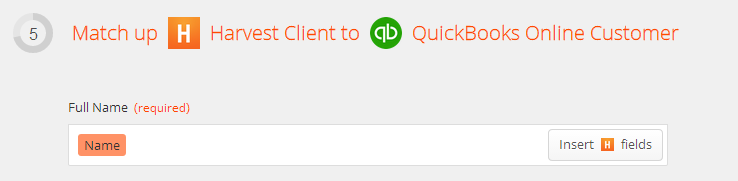
Next step: matching up the data in Harvest to the fields in QuickBooks. When you create a new client in Harvest, you only need to enter Name and “Details”, which can be the customer address. I mapped those to the Full Name fields and Address Line 1 field in QuickBooks Online.
Last but not least, test the Zap and give it a name.
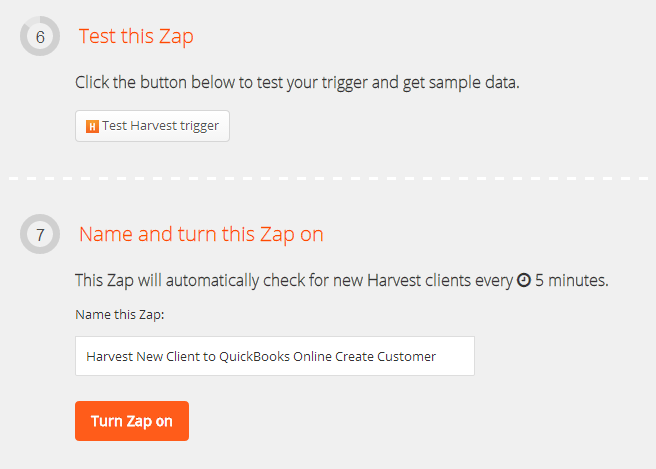
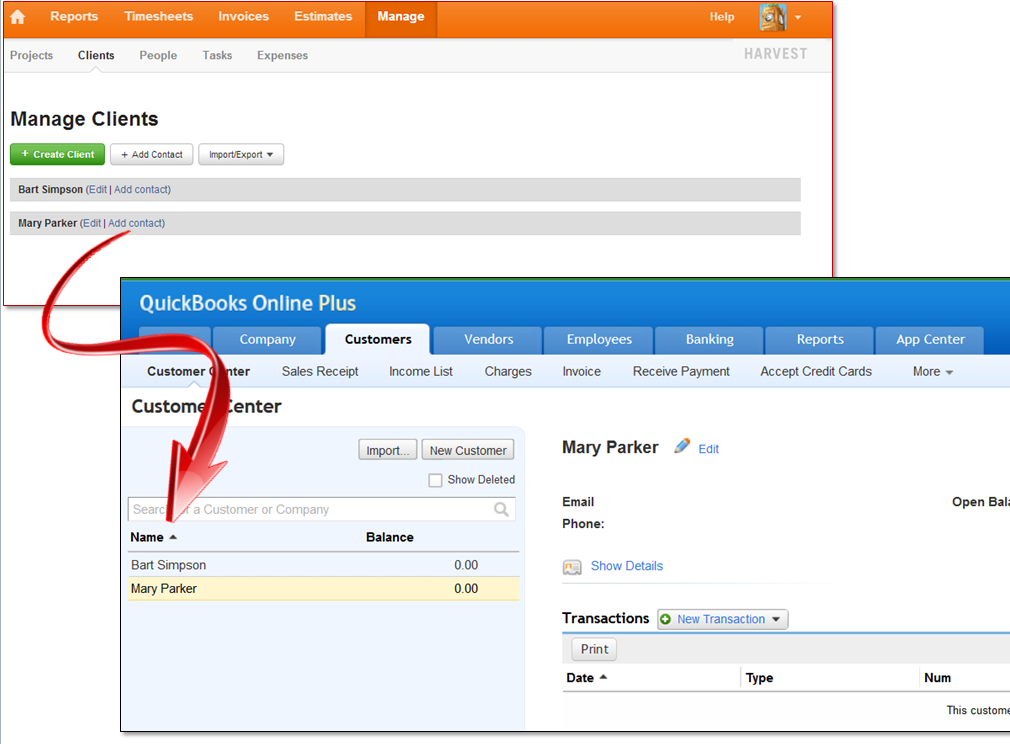
Save your Zap: by default it will run every 5 minutes. We have to add a new client to Harvest to kick off this workflow. So I headed over to Harvest, login and click Manage from the menu, then clients from the sub menu. I added 2 new clients “Mary Parker” and “Bart Simpson”. Zapier will automatically sync those two clients to QuickBooks Online after 5 minutes. However, If you are impatient like me 🙂 you can go to your Zaps, click the settings icon and manually run it immediately.
It is as simple as that to connect QuickBooks and Harvest together. If you want to try another integration, try adding another Zap to create a new invoice in QuickBooks whenever an invoice is created in Harvest.
That completes this exercise on integrating Harvest and QuickBooks with no coding necessary. I find that for very simple one directional workflows, Zapier is very simple to use. I would love to see bi-directional synchronization in the future. That would make the Zapier tools even more powerful.
If you have done any interesting integrations using Zapier I would love to hear from you in the comments below.
Happy coding, or in this case no coding necessary.
Jarred Keneally
Leave a Reply